.svg)
How to Integrate Webflow Forms with Mailchimp


Mailchimp is one of the easiest email service providers to integrate with Webflow forms. While sending data from a Webflow form to an external tool usually requires the use of an automation tool like Zapier or Webflow Logic, integrating Mailchimp can be done directly in the form settings using the Action URL.
In this article, we’ll walk through how to create your form in Mailchimp and use the Action URL to connect your Webflow form. We’ll also show you how to automatically add tags to your form submissions, and how you can do all of this in CMS template pages with varying tags.
How to Connect a Webflow Form to Mailchimp
Step 1: Create an Embedded Form in Mailchimp
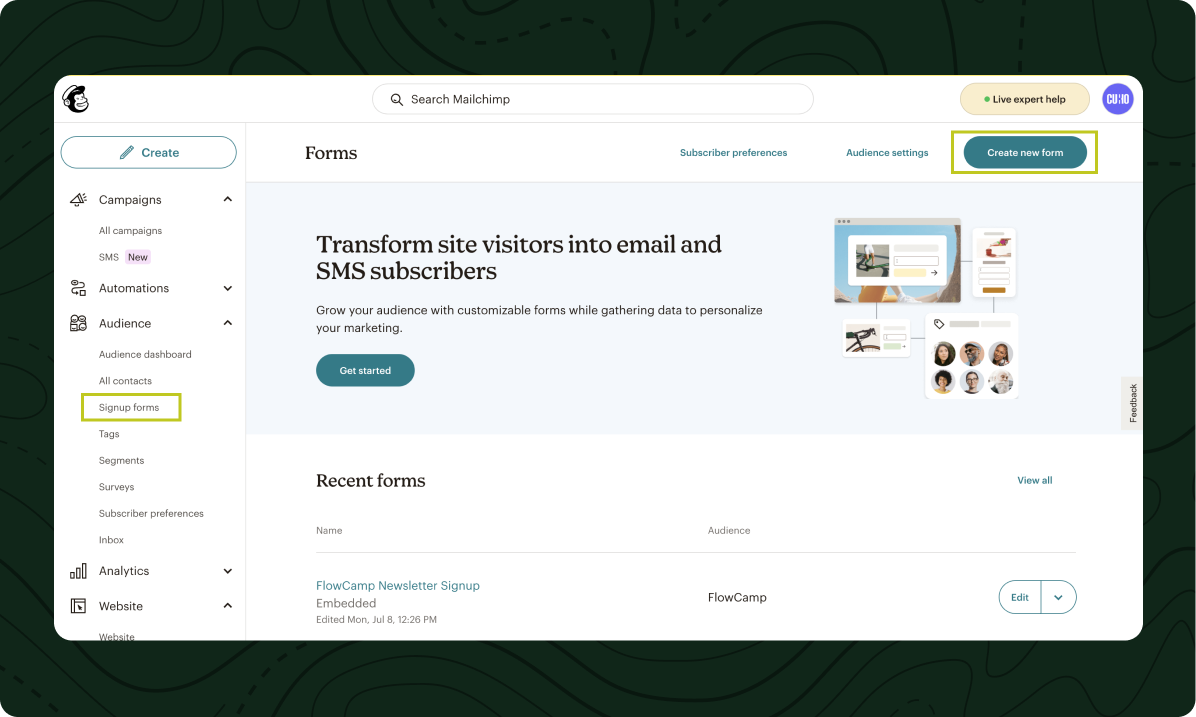
In your Mailchimp account, navigate to the Signup forms page, then select Create New Form.
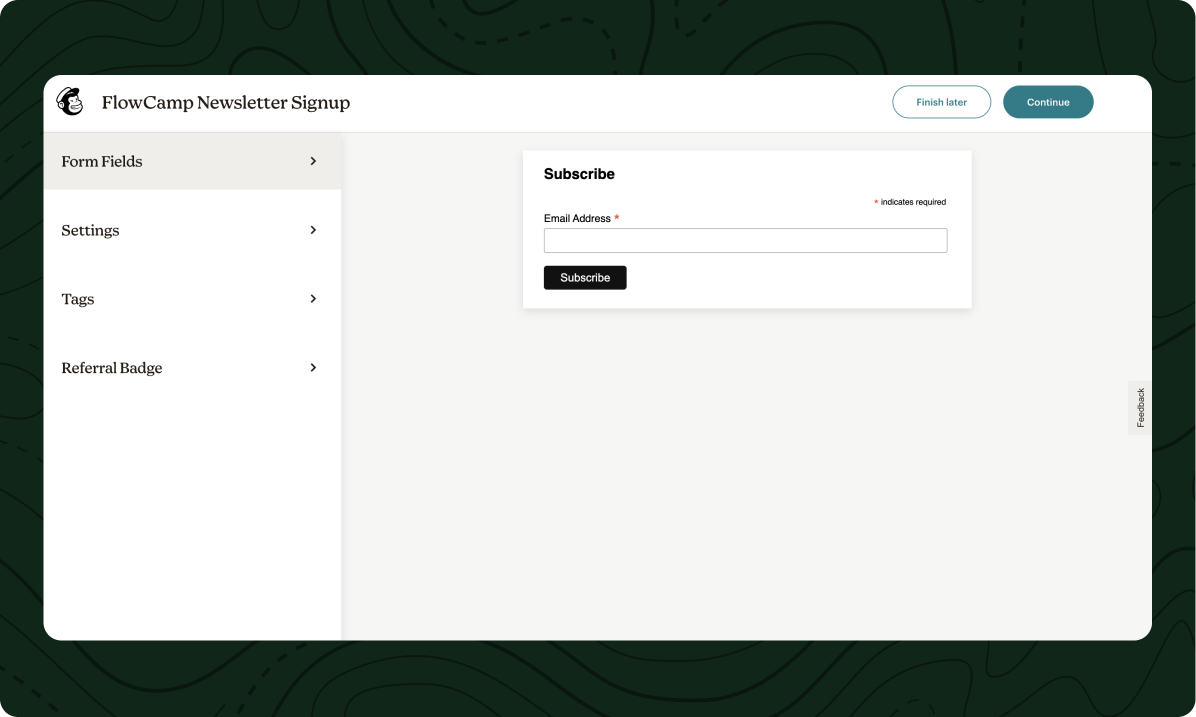
Choose the Embedded Form option, then give your form a name and select the audience that submissions should be added to.
Add the necessary form fields to match your Webflow form.
Step 2: Copy the Action URL
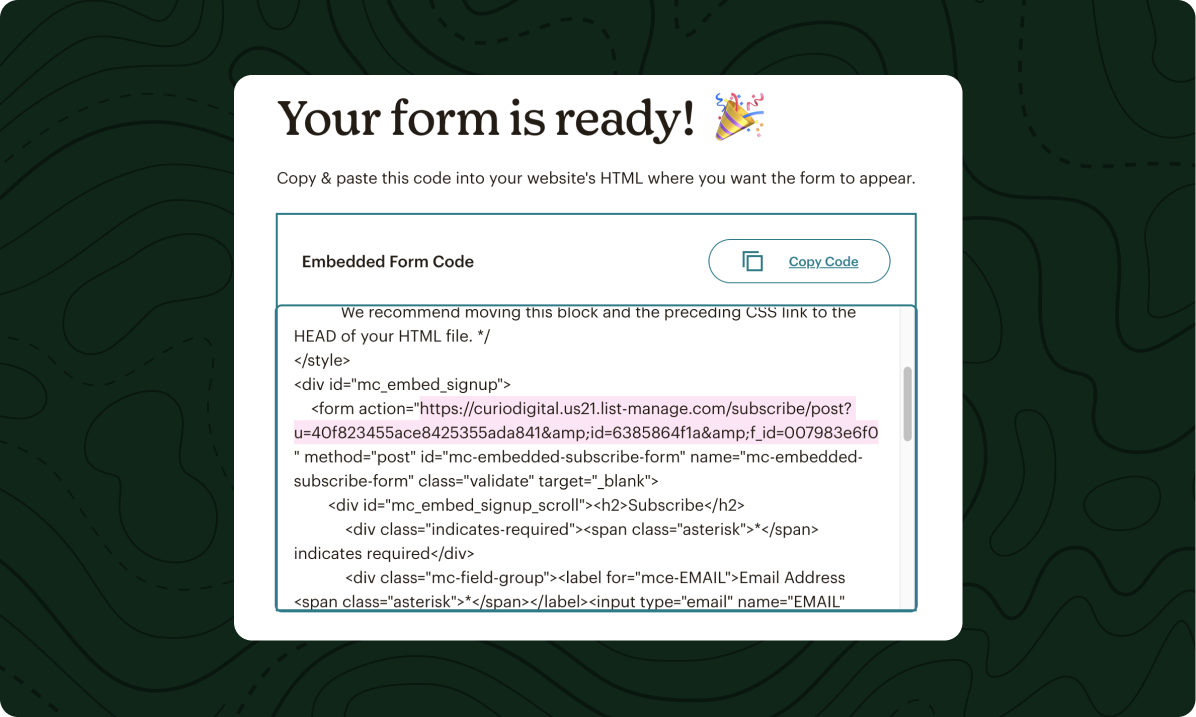
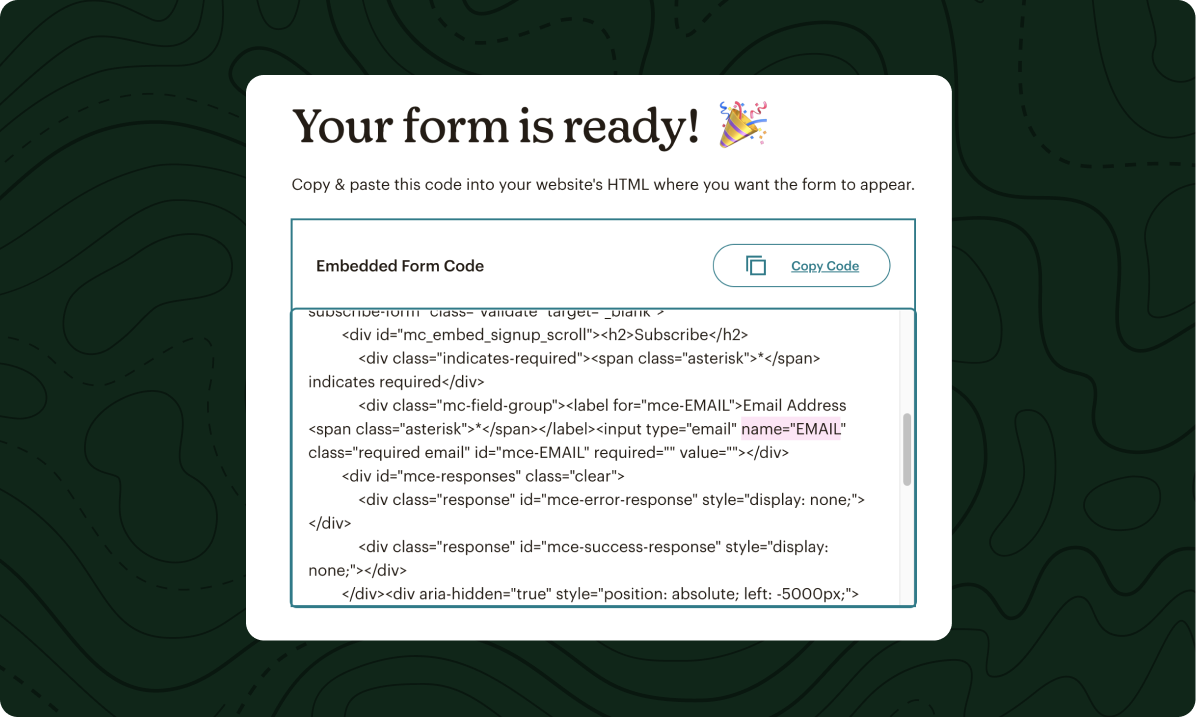
Click the Continue button, and Mailchimp will bring you to a page where you can view your embedded form code.
Find the line of code that starts with <form action= and copy the URL contained within the quotes that follow.
Step 3: Add the Action URL to Your Webflow Form
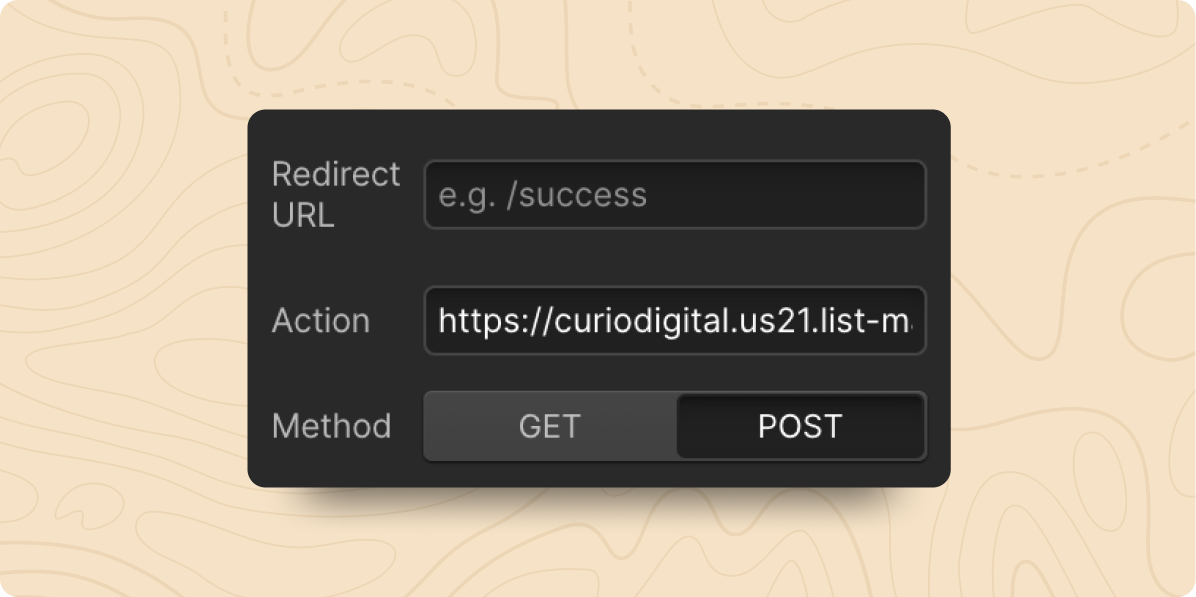
In Webflow, navigate to the form you would like to connect to Mailchimp. Once you have selected the form, go to the Settings panel, and locate the Action field. Paste the Action URL you copied from Mailchimp into this field.
Step 4: Update the Method to POST
Just under the Action field, update the Method dropdown to POST.
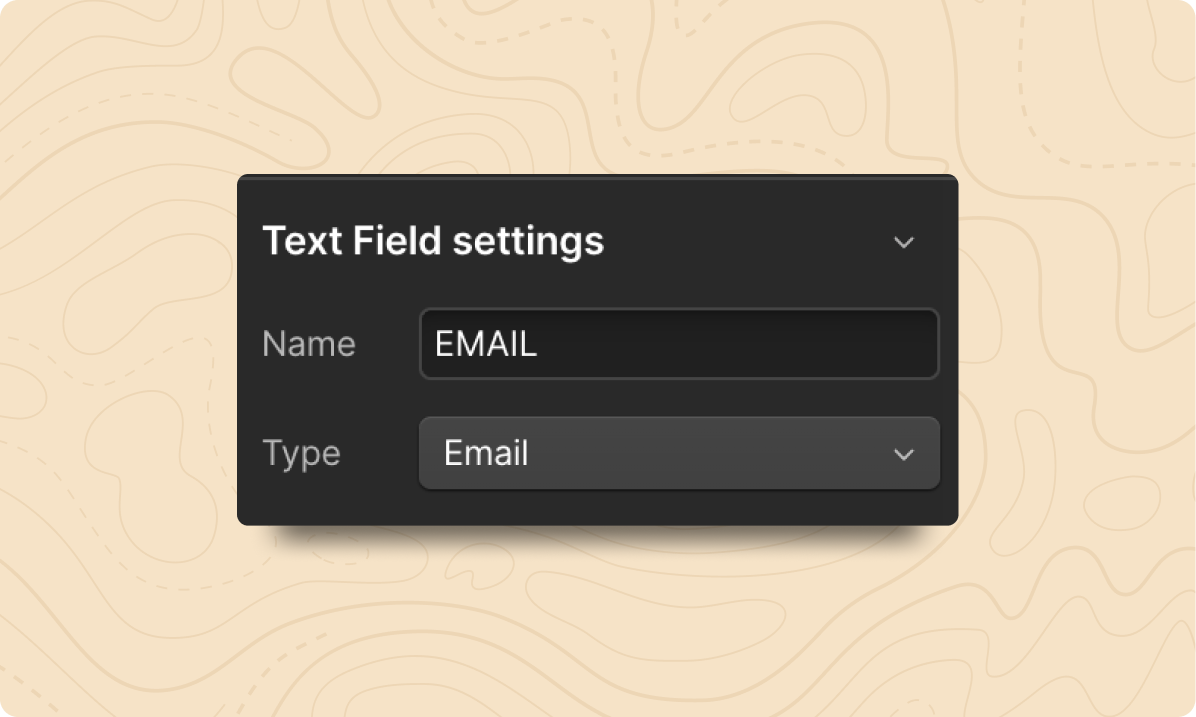
Step 5: Ensure that Field Values Match Mailchimp’
Finally, ensure that the Name value for each field matches what is in Mailchimp. You can locate the name for each field in your Mailchimp embed code by searching for name=.
How to Add Tags to Form Submissions
Step 1: Add an Embed Code Block to Your Webflow Form
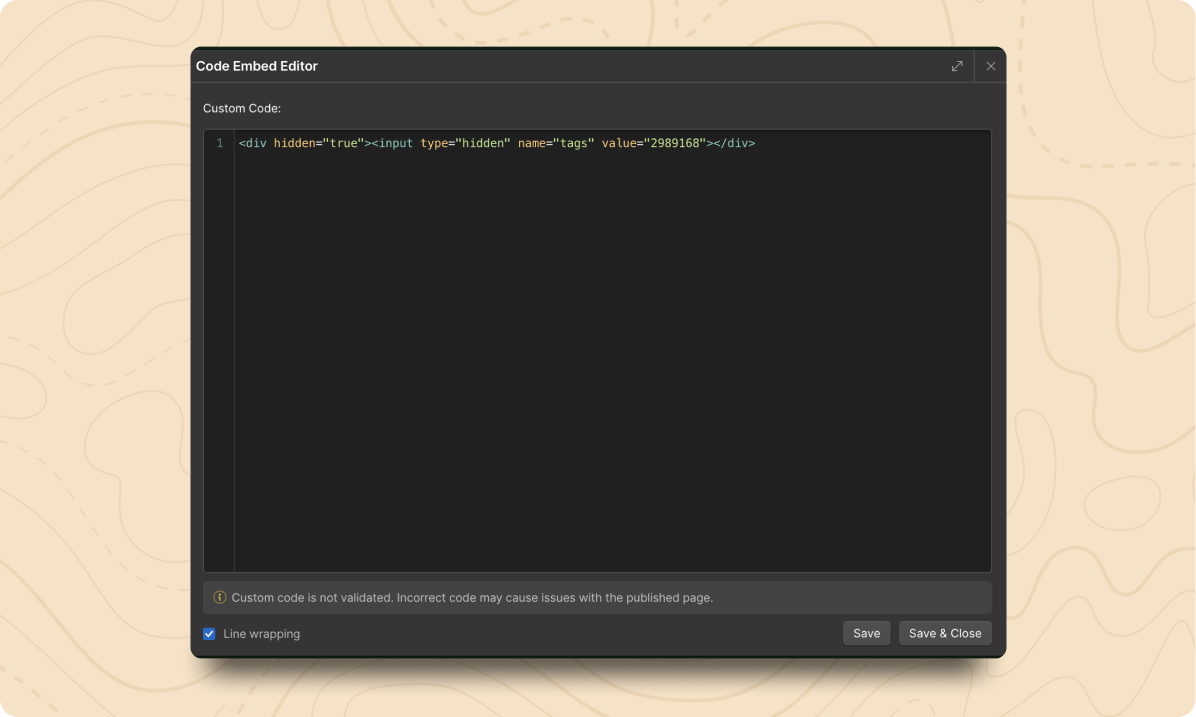
Drop an embed code block inside your Webflow form, then paste the following code inside:
<div hidden="true"><input type="hidden" name="tags" value="######"></div>Step 2: Copy the Tag Values from Mailchimp
In the Mailchimp form builder, add the Tags you would like to be automatically added to the contact when the form is submitted.
Click Continue to view the code for the form, then search for the code name=”tags”. Immediately following that code, you will see value=”[numbers]”. Copy the numbers inside quotes following value=.

Step 3: Add the Tag Values in Webflow
In the embed code you added in Step 1, replace the ###### with the string of numbers you copied from Mailchimp in Step 2.
How to Add Different Mailchimp Tags to CMS Template Pages
Step 1: Follow the Steps Above to Connect Your Webflow Form to Mailchimp
Paste your Mailchimp form Action URL into the Webflow form settings, then update the Method to POST. Drop an embed code into the form with the following code:
<div hidden="true"><input type="hidden" name="tags" value="######"></div>
Step 2: Create a CMS Field for the Tag Values
In the CMS collection for your template, create a new plain text field called Tag Values.

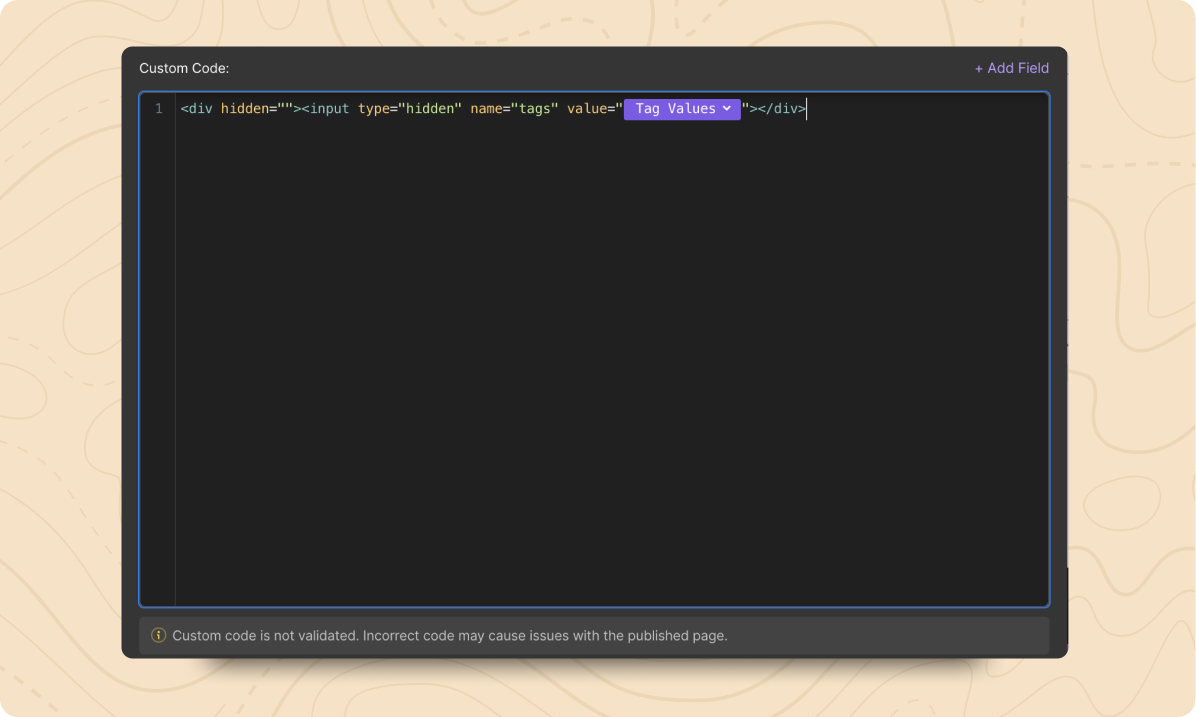
Step 3: Connect the Tag Values CMS Field in the Embed Code Block
In the embed code inside your Webflow form, replace the ###### with the new field you created for Tag Values.
We hope this article has helped you with integrating Webflow and Mailchimp. You might also want to check out our articles on How to Add Schema Markup in Webflow and How to Add Title Tags and Meta Descriptions.
If you liked this article, then please subscribe to our newsletter or follow us on X.


