.svg)
How to Transfer a Webflow Site


Transferring projects between workspaces is an issue that's unique to developers working in the Webflow ecosystem. Webflow makes this process very straightforward, but there are a few important nuances to keep in mind, especially when dealing with live sites. In this article, we’ll walk through the process of transferring a website to a client as a freelancer or agency.
Preparing for a Webflow Site Transfer
When preparing to transfer a Webflow project, there are a few questions to ask yourself that will determine the exact steps you need to take.
Is there an active site plan on the project?
If hosting has already been added to the Webflow project in the current workspace, it will need to be cancelled in order to transfer the project. The steps below will explain when to cancel the site plan in order to minimize downtime if the site is already live.
Does the client already have a Webflow account?
This one’s a bit obvious, but you’ll need to make sure that your client has set up their Webflow account before the transfer. Before starting, you’ll either need to have the email the client created the account with or access to the Webflow workspace.
Do I have access to the client’s Webflow workspace?
Ideally, you should have the client invite your Webflow account as a guest to their workspace. If you have an Agency or Freelancer account, then the client will be able to do this for free by following the instructions in this Webflow University tutorial.
Transferring a Webflow Project
Step 1: Duplicate the Project
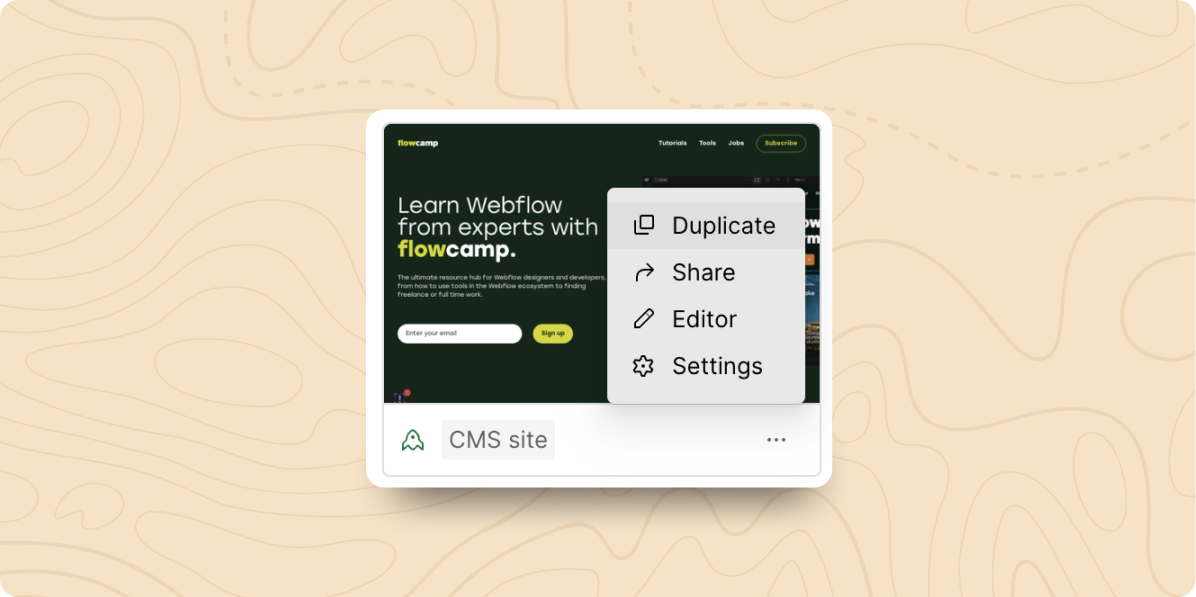
Before starting the transfer, you’ll want to create a duplicate of the project. This means you’ll always have a version of the site that’s in the state it was originally handed off to the client, so in an emergency you can always duplicate and transfer them that version again.
To duplicate the site, select the 3 dots menu under the site’s thumbnail, then click Duplicate.
Step 2: Initiate the Transfer
Navigate to the Site Settings for the duplicated version of the project, then click the transfer icon.
If you do not have access to the workspace you are transferring the project to, you can stay on the To a user tab and enter the email address for the transfer.
If you do have access to your client’s workspace, switch to the To a Workspace tab, and select the correct workspace from the dropdown.
Note: You could transfer the original or duplicated version of the project, but if the original project is connected to a live domain, it’s best to transfer the duplicate to minimize downtime while setting things up in the new workspace.
Step 3: Accept the Transfer
If you are a member of the workspace you are transferring the site to, the transfer will automatically be accepted, and you can access the site by switching to that workspace.
If you used the transfer To a user option, a transfer invitation will be sent to that user, which they will need to accept from their Webflow dashboard in order to complete the transfer and access the project.
Reconnect the Domain (Live Sites Only)
If the original site was live, the steps below are the best way to minimize downtime while connecting your domain to the project in the new workspace.
Step 1: Add a Site Plan
Webflow doesn't allow you to transfer a site plan between workspaces, so you'll need to add a new one to the project that is now in your client’s workspace.
In many cases, it will be easier to have the client add the site plan themselves, as they will need to enter their credit card information to do so.
If your client has already added a credit card to the account and given you permission to add the site plan for them, then you can do so by navigating to the project’s Site Settings, then to the Publishing tab, and selecting the appropriate site plan.
Step 2: Disconnect the Domain from the Previous Project
If the site you're transferring is live, you'll need to disconnect the domain from the original project. Please note that the site will go down when you do this. To minimize downtime, make sure you have access to your client’s new site to finish the remaining steps and get the site live again.
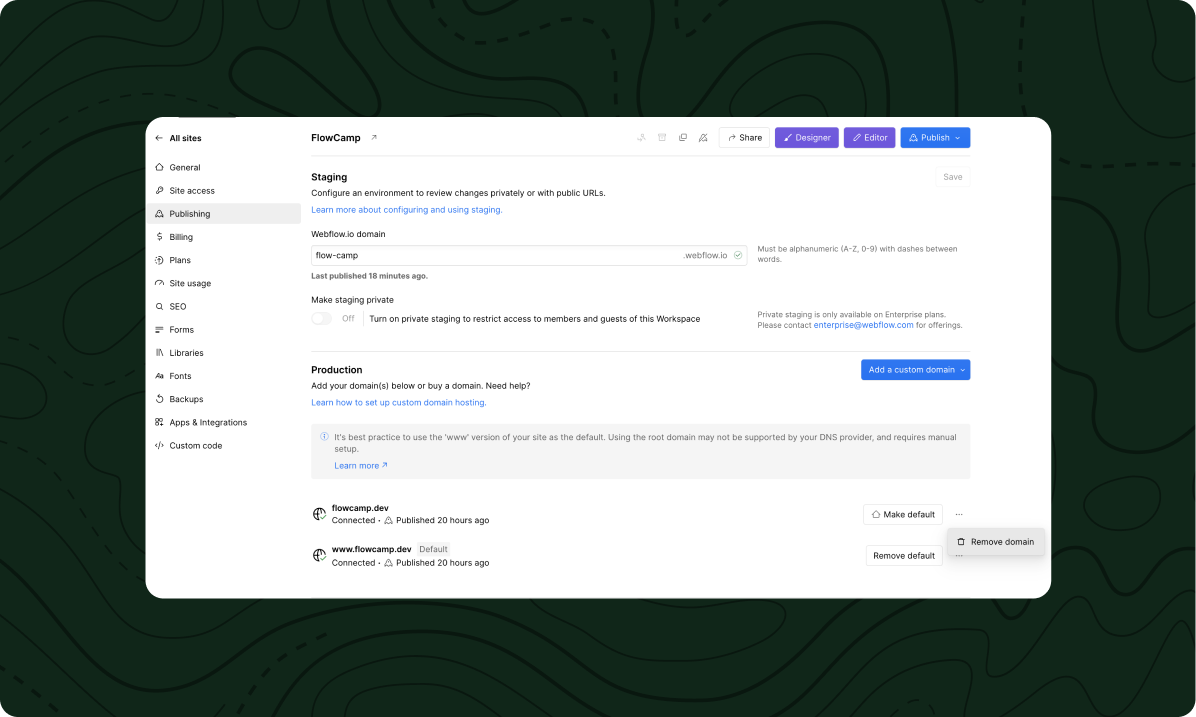
To disconnect the domain, navigate to the original project’s Site Settings, then to the Publishing tab.
Next to the domain you are removing, select the 3 dots menu, then click Remove domain.
You will also want to be sure to cancel the site plan that was attached to the project. This can be done in the Billing tab. Webflow’s support team will generally give refunds on the remaining time in cancelled site plans on projects that are being transferred to new accounts.
Step 3: Connect your Domain
In your client’s workspace, navigate to the new project’s Site Settings, then to the Publishing tab.
Since your site was already connected to Webflow, you won’t need to update any DNS records. Simply add your custom domain to the Production section in the Publishing tab.
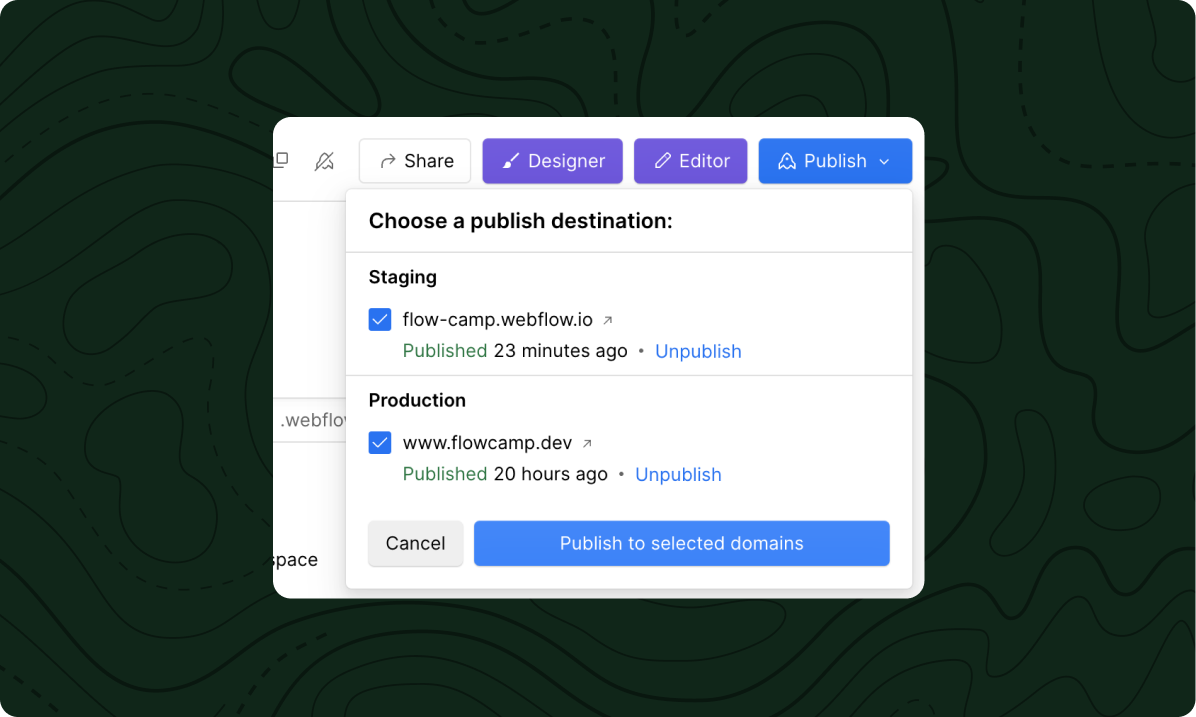
Step 4: Publish
Once the domain is connected, you will still need to press Publish for the site to go live. Be sure to check the Production domain in addition to the Staging domain, then click Publish to selected domains.
We hope this article has helped you with transferring your Webflow site. You might also want to check out our articles on How to Add Title Tags and Meta Descriptions in Webflow and How to Add Conversion Tracking to Webflow Forms.
If you liked this article, then please subscribe to our newsletter or follow us on X.


